Thursday, April 25, 2013

The Witches Stitches -- Doll making 101


Cutting Fabric and Sewing
You have decided that you want to make a doll or two. The best way to start is to find a pattern you like. There are many to be found online www.etsy.com  they have a large selection. You can always make your own pattern, but as a beginner you may want to purchase one that appeals to you. Read all instructions for your pattern before you start your 
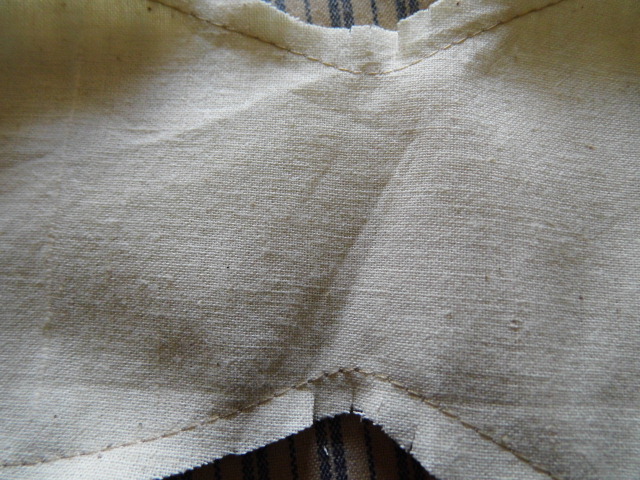
doll.

One of the best ways to sew and cut your pattern out is to trace your pattern onto white freezer paper.  You can purchase this at any grocery store. After you trace all the pieces onto freezer paper cut them out. Place the pieces on your fabric making sure you leave space between each piece so you have room sew around it, about an inch. Set your iron to whatever setting is right for the fabric you are using.  Iron the freezer paper pattern pieces onto your fabric SHINY side down, cut around each piece making sure you have left your seam allowance around each one. Sew around each piece making sure all your stitches are straight. Take your time sewing around the corners.  Make sure you leave the openings when the pattern indicates so you can turn your pieces to the right side.  


After you have sewn around all your pieces, trim and remove the paper from your fabric. Just lift from the edge and pull. Save the paper pieces, you can use them over and over again until the shiny side no longer sticks. You can get as many as 6 dolls from the same pieces.
Cut around the pieces closer making sure you leave an even seam allowance around each piece. After they are all cut out you will have to clip any curves or section with indentations with small slits. This will allow your piece to lay flat after you have turned it to the right side.


Now you are ready to stuff your doll.


How to make smooth seams on your dolls

Ever make a doll and it has bumps all around the seams? Well there are 2 ways you can make sure that does not happen and your dolls have smooth professional look.
Wrinkle free seams start with making sure your stitches are all straight and none of them are out of line. One stitch out of line and there will be a small lump in the seam. After you have finished sewing your seems check them to see if any stiches are out of line. If they are just go over that part of your seem.
Begin to stuff your doll with small pieces of whatever you have chosen to use. You will have to make sure you stuff the pieces tight to make sure you have a smooth seam line.  This way you build a lot of small layers instead of trying to stuff with large pieces. Using small pieces will take a little longer, but the smooth finished look you get is so worth the time.
A great tool to use is called a stuffing fork, you can place stuffing  in the smallest area. You can find one at www.etsy.com just put the words stuffing fork in the search and you will find several.
The Key in using a stuffing fork is to let the teeth on the end of the fork grab the stuffing and then twist it a bit. This keeps the stuffing on the fork while you guide it into place.
After you have finished stuffing your doll check all the seams. If you see any lumps take a very small piece of stuffing and use your stuffing fork to place the stuffing where it is needed.  If no more stuffing is needed, use your stuffing fork and slightly rearrange the stuffing already there. This will give you smooth professional looking seams.
If you have any questions feel free to contact me and happy doll making!

Tuesday, April 23, 2013

Gift Jar Recipes for Mother's Day

Not sure what to get your favorite Mother for her special day?   How about some food kits in a jar.

Here are some recipe mixes she might like.  Make them extra special by putting them in a basket and add a special coffee mug to go with them.

 INSTANT CAPPUCCINO MIX

1 c Instant Coffee Creamer
1 c Instant Chocolate Drink Mix -- powdered
3/4 c Instant Coffee Crystals
1/2 c Sugar
1/2 tsp Ground cinnamon
1/4 tsp Ground nutmeg

 Combine all of the ingredients and mix well. Pour into jars.
Attach the following note to jar:

 Instant Cappuccino Mix -- Use about 3 tablespoons or 4 teaspoons per 6 oz cup of boiling water.


CHOCOLATE CHIP OATMEAL COOKIE IN A JAR

3/4 cup white sugar
3/4 cup packed brown sugar
1 cup rolled oats
1 1/2 cups all-purpose flour
1 1/2 teaspoons baking powder
1/2 teaspoon salt
1 cup semisweet chocolate chips
1 cup chopped walnuts (optional)

Using a 1 quart or 1 liter jar, layer in the ingredients in the order given. Pack down the jar after each addition.
Put the lid on, and cover with an 8 inch circle of fabric. Secure the fabric over the lid using a rubber band, then cover the rubber band by tying a nice piece of ribbon or raffia around the lid.

Attach a tag to the ribbon with the following instructions:

Preheat oven to 350 degrees F (175 degrees C). In a medium bowl, cream together 3/4 cup of softened butter, with 2 eggs and 1 teaspoon of vanilla. Add the entire contents of the jar, and mix by hand until combined. Drop dough by heaping spoonfuls onto an unprepared cookie sheet. Bake for 12 to 15 minutes in the preheated oven. Makes 2 dozen.

This last recipe is one you actually prepare and gift ready-made.  This is a wonderful gift for a health conscious Mother.

COCONUT GRANOLA

2/3 cup shredded coconut
1 tsp. cinnamon
4 1/2 tsp. grated orange peel
1/4 tsp. nutmeg
1/2 cup firmly packed brown sugar
4 oz. wheat flakes
1 1/2 sticks melted, unsalted butter
4 oz. barley flakes**
1/4 cup pure maple syrup
4 oz. rye flakes**
1/2 cup blanched whole almonds
1/2 cup dry-roasted cashews

Preheat oven to 300 degrees F.

Line 2 baking sheets with aluminum foil.
Mince orange peel with sugar in food processor about 1 minute.
Add butter, maple syrup, cinnamon and nutmeg and blend 5 seconds.
Add remaining ingredients; toss thoroughly.
Spread on pans and bake until dry, stirring every ten minutes, about 45 minutes.
Cool and store in airtight container or jar.

Attach a pretty lid if giving as a gift **Available at natural food stores or substitute rolled oats.

Sunday, April 21, 2013

Jacquie's Upcycle Nation: Jello Mold Pin Cushions

This week's trash to treasure is a quick and simple pin keep made from items most likely in the back crevices of every home: an outdated sweater and a vintage tin Jello mold.
As winter woolies are packed away for another year there is always an odd wool sweater, blanket or scarf that hasn't seen the light of day for more than a few seasons.  No need to be embarrassed by that 1990's cute theme sweater that never seems to disappear!  Now is the time to up-cycle it to new glory!
 Next dig to the back of the kitchen cupboard, behind the cookie cutters and under the mismatched random Tupperware lids to pull out those old vintage metal molds. The smaller single serve size works best for this project.
If not already at home, these tidbits can also be found in abundance at local thrift stores. Just be sure to use items of 100% wool. 
 Machine wash and dry on high heat to "felt" the sweater.  This compacts the fibers to create a stretchy but firm fabric.
After a wooly is chosen and felted, you will also need the following:
*Sharpie marker  *Wood glue  *Scissors
*thread or embroidery floss
*fiberfill* embellishments

With a Sharpie marker, trace 1/2 inch out from the mold onto the folded fabric, right sides together. 
 Don't worry if the circle isn't perfect.  The stretch of the fibers is very forgiving.
Cut the circles out and pin at center, leaving right sides together.
Machine stitch 1/4 - 1/2 inch from circle's edge.
Cut 2 inch slit on bottom side of circle. No need to clip around the outside. (All hail stretchy fabric!)
 Turn right side out and firmly stuff with fiberfill.
 When you think you can't stuff it any fuller, stuff a little bit more! Place the ball inside the mold to test the shape, firmness, and roundness.  Once you are satisfied with the appearance, slip stitch the opening closed.  These stitches should not be pulled tight but left loose like a toothy grin.
Fill the mold with wood glue.  Don't be shy- go ahead and slather it in, leaving the interior top inch clean.  This will prevent any oozing over the outside edge. Once the wool ball is inserted in the tin, place the pin cushion (right side up) under a large book to apply constant pressure as the glue dries. Let it remain drying under pressure for at least 6 hours.
 Wallah!!!  Your Jello mold pin cushion is ready!
 Now you can admire the fabric in its simple state or go hog wild with the embellishments!
 Here are a few examples of pin cushions I have made in the past.  I adore needle felting and find these wee canvases irresistible! 
Theme sweaters offer instant embellishment that turn a fashion faux pas into an heirloom keeper!

Experiment with your own style!  Mix up the molds- any shape and size can be used applying the same steps. These sweet keeps make perfect gifts for the stitcher in your life!

Blog Party Sunday - Share Your Handmades

Welcome to our Blog Party Sunday. We would love to have you show us what you are crafting.

You are allowed to add 3 links to your shops or your blog.

The rules are simple:
1. Follow our blog
2. Handmade items only.
3. You may list up to 3 items.
4. Family friendly items only.

The success of this link party depends on the participants so spread the word to your friends, visit the shops,  post about it on your  blog, in a forum or on your favorite social networking site, grab the button and put it on your blog or website.
Just click on the Add Your Link button below and add your items.
And if you would like to add a link to the party you can grab this button below.