Today's organizational post is about the variety of uses for pegboard in a craft/sewing room.
My sewing room is pretty small, only 8 ft. by 10 ft., so I have had to make use of every available space. This outside wall is block so very hard to attach anything to it.
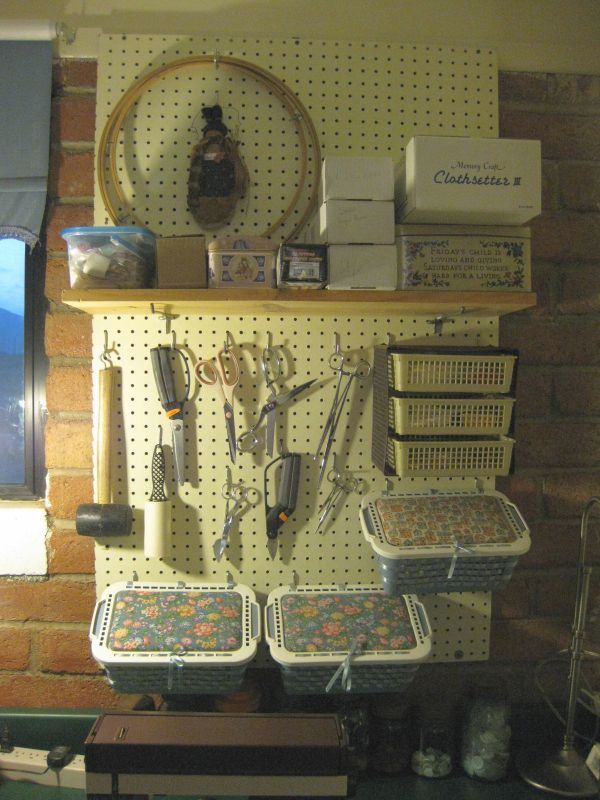
I solved the problem of wasted space by putting a large piece of pegboard in this spot.
I painted it to match my wall paint, attached it to the wood at the top of the wall and then had to decide how best to use the space.
I added a shelf, hooked some covered baskets to the bottom and side and even found a spot for the basket holder that has been sitting on a table in my way for some time.
I decorated these baskets a long time ago so I don't know if they are still available but I will show some close up pictures of how they are put together.
For the fabric on the lid, just cut a piece of cardboard the size of the middle of the lid and cover it with batting and fabric and glue it to the lid. The front of the lid has 1/4 inch ribbon glued at the sides and then woven through to the middle and tied in a bow.
Weave 1/2 inch wide ribbon through the basket sides. And the lid is tied to the basket in the back with three pieces of ribbon left a little bit loose so the lid will open and close and tied in a knot. These baskets are just hooked over a couple of peghooks under the basket lip.
To give you more ideas for using pegboard in the craft room here are some that I found on the internet. They make all kinds of tools for pegboard so the possibilities are endless for organization.
This one is from
The Blessed Nest blog
This one is used for stamping tools at
iStamp blog.
These next two were found on
Craftster.org
Thanks for stopping by. I hope you enjoyed the post.
Bette Shaw