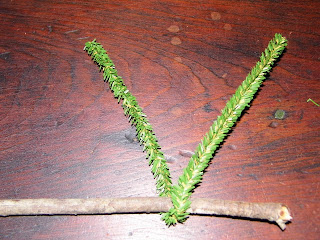
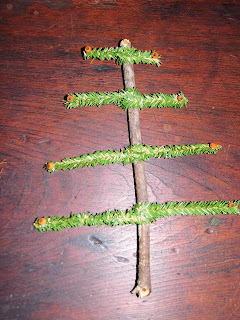
Step 1 – You will need to choose a center stick for your tree. I just cut a twig the size I want my tree to be. You will also need the branches part. For this is use Home for the Holidays Pine Stems. I got them on ebay from the seller 1804 primitives. I am sure you can get them at your local craft shop too. These have a wire running through them and will bend a keep whatever shape you want and you can cut them with just scissors.
Step 2 – Starting from the bottom of the twig, wrap your
branch once around the center twig. Make sure you put a dab of glue on the twig
and then wrap so it will stay in place. I use Aleene’s tacky glue in the gold
bottle. The bottom branch will be the
longest. S you go up the tree and add branches they will be smaller and
smaller, the smallest being right at the top. Snip your branch so they are
even. Let the glue dry.
Step 3 – Now you are ready to embellish your tree if you
want. You can glue a little red berry at the end if you want or you can put
rusty stars or bells on the ends of the branches. You can also tie a tiny piece
of homespun or cheese cloth at the very end of the branch. The little berries I used I got from my yard
and I dried them. It is all up to you what you choose.
Step 4 – Now your tree is done. You can place it in the arms
of a doll or you can put it in some kind of base, again it is what you want it
to look like. They look great with an old wooden spool as a base. Just stick
the twig into the hole in the spool and instant base. Wrap a little fabric
around the spool and it looks even better. I would show you a picture of this
but I have no idea what I did with my wooden spools. Sorry.
It is really that easy. The longest part is letting the glue
dry. The rest takes only a few minutes.
If you have any questions please give me a shout. Enjoy,
Faith


No comments:
Post a Comment