Sunday, January 12, 2014

Blog Party Sunday -- Show Off Your Handmades

Welcome to our Blog Party Sunday. We would love to have you show us what you are crafting.

You are allowed to add 3 links to your shops or your blog.

The rules are simple:
1. Follow our blog
2. Handmade items only.
3. You may list up to 3 items each week.
4. Family friendly items only.

The success of this link party depends on the participants so spread the word to your friends, visit the shops,  post about it on your  blog, in a forum or on your favorite social networking site, grab the button and put it on your blog or website.
Just click on the Add Your Link button below and add your items.
And if you would like to add a link to the party you can grab this button below.


Friday, January 10, 2014

Today's Featured Shop -- Annie Beez Folk Art

Today's featured shop is Annie Beez Folk Art.   Annie offers finished items such as original folk dolls, small handmade pincushions and embroidered pillows, and original mixed media paintings and patterns.

Primitive lady bug cloth doll


Hand Quilted Prairie Table Mat


The Hunny Bunnies Doll Pattern


Lil' Honey Raggedy Annie  Pattern


Be sure and visit Annie's shop to see all she has to offer.  https://www.etsy.com/shop/anniebeez

Thursday, January 9, 2014

Witches Stitches No Calorie Chocolate Bunnies

I know it is only January, but I am thinking about spring already.  So this week I thought I would make calorie free chocolate bunnies.  If only…sorry but these bunnies are made out of fabric. Kind of a letdown, I know, but their cuteness will make up for it.

They are so easy to make and place a few of them in an antique basket with some Easter grass and they look too cute. They will stay in the basket and never on your hips. They are made from cotton muslin that has been dyed, painted and sanded. You don’t even have to buy a pattern.  You can if you want but no need you can find one for free online.
Step 1 – Find a pattern. I found one by going to Google Images and typing in Easter bunny outline. I found one that has no copyright and it looks like a chocolate bunny. You can make these bunnies as big or small as you please. So print out the style of your choice. Now trace it out on freezer paper. You now have your pattern.

Step 2 – Iron your freezer paper onto your cotton fabric. SHINNY side down. Sew around the paper leaving enough room open along the bottom so you can turn and stuff it. Tune and stuff. When you are done stuffing, whip stitch the bottom closed.

Step 3 – Take a running stitch in your bunnies ears right down the middle so you have definition and it looks like he has two ears.  Pull each stitch a little tight, so you see an indentation. Now do the same for an eye. Just go back and forth on the sides of the bunny head.

Step 4 – Preheat oven to 250 degrees. Place parchment paper on a cookie sheet. Take 3 tablespoons of instant coffee and dissolve in ½ cup of hot water.  It will be dark, you want it that way.  Paint one side of your bunny with your coffee, (a stiff brush works best for this). Place him unpainted side down on prepared cookie sheet and place in oven. Just do one side at a time. This way you will not have any burnt spots. It should take about 10 minutes to dry. DO NOT LEAVE THE KITCHEN WHILE YOUR BUNNIES ARE IN THE OVEN.  Now do the other side. When both sides are dry, paint one side with slightly watered down craft paint. Use a dark chocolate brown color. Place it in the oven painted side up for about 10 minutes, Remember, no leaving the kitchen. Do the other side. When your entre bunny is dry, it is time to sand, Use a medium sand paper and do not rub too hard or you will put holes in your fabric. You will want to do this outside, it will make paint dust. How much you distress him depends on your style.  When he looks like you want, you are done.
You can do a bunch of these at once. Three makes a nice display. As always if you have any questions give me a shout.


Wednesday, January 8, 2014

Handmade Spotlight - Sticking Your Neck Out

I found this to be quite an interesting collection of items and wanted to share for today's handmade spotlight. Hope it makes you smile! :)


Tuesday, January 7, 2014

Needles-n-Pins Stitcheries: Recycling Christmas Cards

Now that Christmas is over are you wondering what to do with those Christmas cards? Some of you probably still get lots of Christmas cards, but I am not one of them. I get a few, but then I don't send many out anymore so that could be the reason. :)  If you are one of those that still gets a lot of them and were wondering what to do with them Karen over at Sew Many Ways has a wonderful way of recycling them. I love canning jars and the art of Christmas cards so it kind of makes me want to buy some Christmas cards! :)

Here is the tutorial from Karen of what to do with those Christmas cards.....


canning jar card

 Save  your Christmas cards or if you are like me you will need to buy some....this is a good time to get those 50%-70% off cards.


canning jar card


Pick out a nice design you want to use.


canning jar card


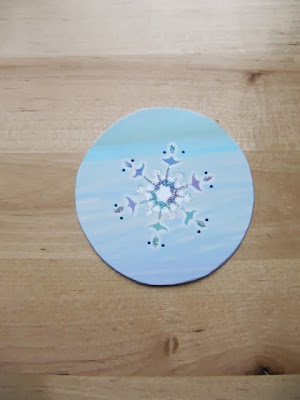
Use the lid to trace a circle on plastic. She used an old notebook divider. I would probably use quilting template plastic.


canning jar card


Cut the circle out.


canning jar card


Place the lid on the jar first and then the card on the top of the canning jar.


canning jar card


Screw on the lid and add a ribbon. 

Thanks again to Karen over at Sew Many Ways for this tutorial. This makes a really nice gift idea! You can fill the jar with all kinds of different things. One thing I might use....is fill it with sewing notions. What a nice gift for that friend of yours that sews!

Have a great day!!

Colleen :)