Thursday, August 8, 2013

Witches Stitches - Pumpkin Faces


Greetings,

I just have 2 tips to post this week. With all the rain I am so behind in my orders that I am spending my time playing catch up. (Nothing dries with the rain and humid weather) So this is a quick post.

Anyway…fall is right around the corner. We will be making pumpkins and fall decorations soon, if you have not started already.

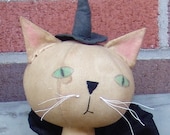
I thought I would post 2 ways I make faces for cloth pumpkins. The first is so easy. Just go to Google images and do a search for pumpkin face outline. You will find a large amount of different faces. Pick one you like that is not copy right protected, (it will say), then copy and paste it into word. You can then make it whatever size you choose. Print it out. Now cut out the eyes, nose and mouth and use it like a stencil. Trace the images you want with a pencil then remove the paper and fill it in with a sharpie marker. This way the eyes are even and you can do a few that look the same.

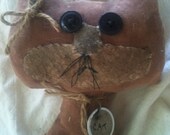
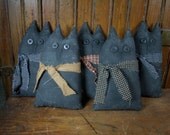
The other way I do the faces is “applied fabric” eyes, nose and mouth.  I cut out the shape of the features I want for the face from scrap pieces of fabric. Then I place them all on the cloth pumpkin before I start sewing to make sure they are the size I want and they all fit. It is always better to cut them a little bigger if you are not sure of your size. This way you can trim them down if needed. Then with a very simple stitch I use black thread and sew them on. This gives my pumpkin a primitive look. I have included a picture of each kind of face.
Hope this helps in your pumpkin making and talk with you all next week.
Faith


Tuesday, August 6, 2013

Needles-n-Pins Stitcheries: Grip That Ruler


When you are cutting out fabric does your ruler slide all over the place? Mine did, but then I read about Invisi-Grip by Omnigrid.
 

rulers


I was skeptical at first until I put it on my rulers and what a difference it made. No more pushing so hard on the ruler to keep it in place. Here is how you add it to your rulers.
 
rulers

Unroll Invisi-Grip onto your rotary cutting mat with Invisi-Grip facing up.


rulers
 
 
Position ruler over Invisi-Grip and rotary cut approximately 1/4 inch smaller than the size of your ruler.
 
sewing


Peel off paper backing and apply to the under side of your ruler.
 
rulers


Press out any wrinkles and whalla.......you have a ruler that will grip the fabric better.
sewing


 I really like it and it does help quite a bit. Saves on the muscle power that is for sure. :)
 
Happy Sewing!
Colleen :)


Monday, August 5, 2013

Jacquie's Up-Cycle Nation: Set A New Table

Simple vintage tables add romance and kitsch to any room.  Often old tables need a bit of TLC before they're ready for display but I've yet to meet a vintage table I can't up-cycle into a new life. 
This poor table once carried the weight of a silver chest.  Long abandoned by the chest, the table top is cracked but the frame is still strong.  With a 1/4 inch drop, the top is perfect for creating a shallow showcase table. 

Luckily, I found the perfect sized glass top at the Saint Vincent DePaul warehouse sale.
Because the table is clean and sturdy, this flip is quick and easy. 
 Sanding is the key to getting paint to adhere evenly to any wooden surface.  Always sand with the grain and be sure to wipe away all sanding residue prior to painting.
Apply two coats of paint with primer.  Lightly sand with 220 grit paper after each coat.
While waiting for the paint to dry, measure display area and cut paper to fit.
 For this project I am going to use a scrap of French paper that has been rolled up in my closet for well over a year.  Time to bring it back into the light!
 Of course there are other contenders such as this fab Robyn Pandolph fabric!
 Oh and then there's some fabulous vintage lace that would be lovely as well!
There's such freedom in knowing the paper can be changed out with my every decorating whim! 
 The French bird paper fits nicely with the nature themed accents- a perfect vignette for the remains of summer!
LOVE  &  UP-CYCLE NATION!
Jacquie Wheeler
Hand of Bela Peck


Sunday, August 4, 2013

Blog Party Sunday --- Show Us Your Handmades

Welcome to our Blog Party Sunday.    We would love to have you show us what you are crafting.


You are allowed to add 3 links to your shops or your blog.


The rules are simple:

1. Follow our blog

2. Handmade items only.

3. You may list up to 3 items each week.

4. Family friendly items only.


The success of this link party depends on the participants so spread the word to your friends, visit the shops,  post about it on your  blog, in a forum or on your favorite social networking site, grab the button and put it on your blog or website.

Just click on the Add Your Link button below and add your items.

And if you would like to add a link to the party you can grab this button below.