


Up until recently, I used precut freezer paper to iron to my fabric. This is a good option but I am now using an even better one.
I had heard that you could use sticky labels as a backing for your fabric when you do your printing on fabric but had never tried it.
Since I finally tried it, this has been my go to method for printing on fabric.
So here is a little tutorial on using printer label sheets.
First here are the labels I use. Even though these say laser labels they work perfectly well in my ink jet printer. They are single sheet labels that are 8 1/2 in. x 11 in. I found them on Amazon for around $23 for a box of 100. They do have smaller amounts but if you do a lot of printing like I do, this is more economical


Peel the backing off the label sheet and place it on the back of your fabric. Smooth the label with your hands on the back and then turn it over and smooth the front down, too, to make sure you don't have any wrinkles in the fabric.
Trim the excess fabric away from the label. I use my pinking shears for this as it helps to keep any stray fibers from the fabric from getting into my printer.

Here an example of one of my printing projects.

These labels can be used over and over again. I get between 5 to 9 uses before I throw the label sheet away. Just make sure you do a good job of smoothing the label down tight to your fabric.
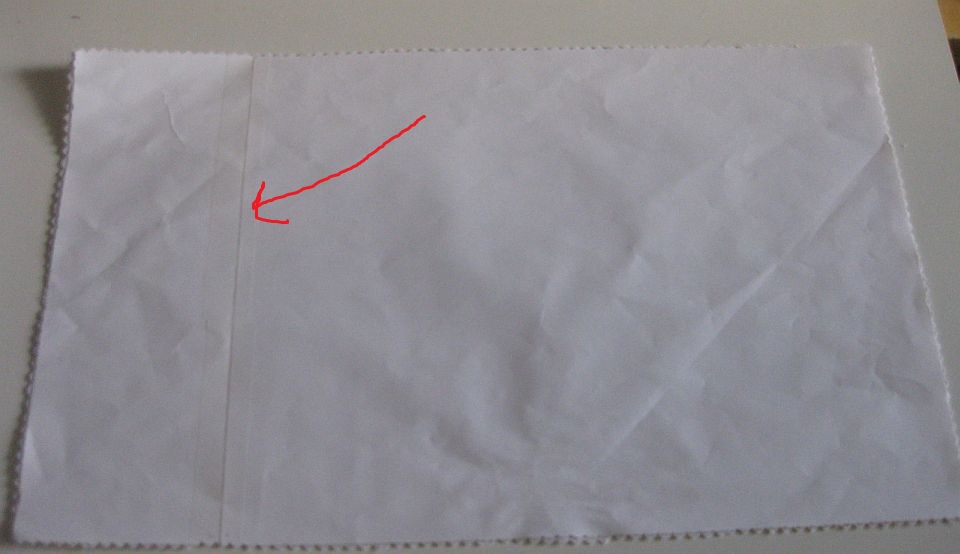
My printer will print up to 44 inches long. I have been doing some 14 inch long prints lately. I cut the extra length I needed to total 14 inches from another label.
Attach the full size label to the back of your fabric. Add the additional piece of label right next it. Now tape across the edges of the labels where they meet with scotch tape. This step is important to keep the fabric rolling smoothly through the printer. The red arrow is pointing to where I added the extra length of label.
If you have been having problems trying to print with freezer paper backing, give this a try. You will be surprised at how quick and easy it is to do.
Thanks for visiting to day,
Bette
Http://www.HandmadeByBette.com
Http://www.bettestomorrowstreasures.com


Thanks for the update. Can you tell what kind and model of printer you use?
ReplyDeleteI have two I am using right now. An Epson Stylus C88+ and Stylus NX230 (I actually bought this one two years ago as a refurbished printer and it is a real workhorse.)
ReplyDeleteThese both feed from the top.
Most of the newer Epson's feed from the bottom and you run into jamming problems with them.
Thank you!!
ReplyDeleteIndeed, rack cards are effective marketing medium to promote your business. One of the best things you can do is to find a reliable online rack card printing company that will answer your printing needs at reasonable cost. LS1 Print
ReplyDelete