Friday, September 27, 2013

Today's Featured Shop -- Prairie Primitives

Today's featured shop is Prairie Primitives.  Tana creates primitive dolls and folk art.


Primitive Owl Witch Doll - grungy stained brown halloween owl with witch hat - #1


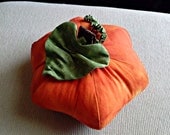
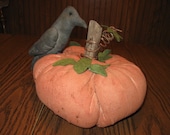
Primitive Pumpkin Head - Halloween decoration


Primitive Crow * Stamped Banner * "Autumn Greetings"


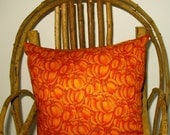
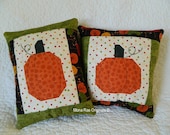
Primitive Burlap Pillow - Antiques - Shelf Sitter - Tuck - #2


Be sure and visit Tana's shop to see all she has to offer.  https://www.etsy.com/shop/PrairiePrimitives

Thursday, September 26, 2013

Witches Stitches – Clay Snowman Noses


I love making snowmen and there are all different items I use for their noses.  I have used antique rusty nails, twigs, but my favorite item to use is handmade clay noses. You can make these any size you choose and in any shape. They are really easy and if you make a whole bunch of all different sizes you will have whatever size you need whenever you need one.

I use oven bake clay to make my noses. I use white clay that I paint later. You can use clay that is already colored if you want. I use the white because I can paint them different colors when needed.
 

Take the clay and divided it into smaller pieces this makes it easier to kneed and shape it.
 
Take a piece off each section and roll it into little balls make the balls all different sizes. 
 
After they are all rolled into balls, take them and roll them between your fingers into a log. Don’t make it to thin or when you shape the nose it will break.  After you have a log, take it in one hand and start to twist with the other. Very slowly, you will see the shape appear. You can then bend them any way you want or leave them straight.

After you are all done with this step, it is time to bake them.  I use an old cookie sheet that I use only with clay. I cu a sheet of parchment paper to fit the inside of the tray. Make sure you use the parchment paper or the metal try can cause the clay to have burn marks. Separate them by size. Keep all the ones that are around the same size together. When you bake them they have to be done by size. The smaller they are the quicker they will bake. I bake all my clay items at 250 degrees.  The small noses I bake for 10 min the larger ones for 15 min. Make sure you set a timer or you may over cook your noses.  A little over cooked can still be ok, but if you leave the clay in the oven to long or set your oven to high you can burn the clay. If his happens you will see a dusty coating on them. Once this happens they can’t be painted, the coating will come through the paint. If this happens I am afraid the pieces are no longer usable. The last thing you want to do is make a dozen noses, just to have to through them out and start over. So please don’t overcook them.  Once they are done and you take them out, they will be HOT don’t try to remove them from your cookie sheet right away. Wait a few min they will not stick.

Now you have them baked you are ready to paint them any color you want.  When I want to use them I just put a little slit in my snowman and use touch of glue.

Enjoy and as always if you have any questions give me a shout,

Faith

Tuesday, September 24, 2013

Papercrafting for Fall and Halloween

Today I'd like to share some cute and fun paper crafts for the Autumn/Halloween season.

The fist one is for 3-D pumpkins made from scrapbooking paper and a cork. This tutorial is from www.eclecticallyvintage.com


Next, I found this gorgeous fall wreath made from coffee filters. I love it! The instructions can be found here... www.allthingsheartandhome.com


This would be a cute one for the kids... stuffed paper apples.  The instructions can be found at www.buggyandbuddy.com


Do you like printables? How about some cute printable owl tags? You can download the for free at www.myowlbarn.com


Last but not least I'm sharing this really cute pumpkin made from a paper lunch bag. Kids would love this one for sure. Find out how to make it at www.spoonful.com


Enjoy the season!
Deena Davis
www,byyourhans.blogspot.com

Monday, September 23, 2013

Jacquie's Up-Cycle Nation: Party Tray

This Holiday Season the tray is back as an entertainment must have! 
Mixing vintage ephemera and 1970's practicality, the tray is the "it" item.  One can spend upwards of $50-100 for a new quality tray.  But here I will show you how an ugly vintage tray can become your custom conversation piece in less than 2 hours for under $10.
I scored this wooden tray at Goodwill for $4. Despite the outdated motif, the tray is quality wood, sturdy, and close to the color of the new trays hitting the holiday shelves.

 
The necessary supplies are at the center of every crafter's closet:
Mod Podge, paint brush, sandpaper, black paint, and scrapbook paper.  Using a home printer, add your favorite clip art or images to the paper.
 Begin by sanding the entire tray to remove the varnish layer.  Be certain to sand in the direction of the wood grain.  Add extra pressure to edges for a distressed look.  Wipe off sanding debris with a damp cloth.
To age and darken the tray, mix 1 teaspoon of black acrylic paint with three teaspoons of water.  Brush on the black wash, going with the grain.  Wipe off excess with a dry rag. 
Once the black wash is dry, apply Mod-Podge to the tray bed and adhere the scrapbook paper. Smooth out any air pockets immediately.  After the first layer is dry, apply a second layer of Mod-Podge.  Have fun with the brush strokes to create a patterned sheen. Apply a third layer of Mod-Podge once the second layer is dry.
To further protect the tray design, apply a clear matte polyurethane stain.
 
 
Trays provide a the perfect party cart for wine glasses, snacks, candles or to create a table centerpiece.  The Holidays call for parties- so make sure you're trays are festive and ready for fun! 
 
LOVE & UPCYCLE NATION!
Jacquie Wheeler
Hand of Bela Peck