Today we have a guest poster, Anna Garner from Polly Ceramica. Anna is giving you a tour of her studio and a little look into working with clay. Thanks, Anna!
Polly Ceramica Studio Equipment! ! ! !
by Anna Garner
Though my name is Anna, I have a fantasy identity as Polly Ceramica, who has a crafts
room full of balls of polymer clay in many colors, lots of workspace prepared for different
steps in the process of making pendants, beads and other kinds of ornamentation in the
beautiful medium of art clay. That crafts room is where I go -- as Polly Ceramica, of
course -- to engage in clay play.
Here is some of the equipment. First of all, Polly Ceramica insists on a smooth heavy
slab where she (I) can roll the clay with a rod before feeding it through a pasta machine
to make the surface smooth and the thickness uniform. Here is one of the boards I like
to work on, but I find that my clay cutters do leave shallow marks on it. I will probably
discard it soon for a thick plate glass work board. Here is a photo of the workspace
with some conditioned clay waiting to be rolled, cut, baked, sanded, waxed and buffed.
You will notice tools such as blades, brushes, texture plates, acrylic rods for rolling the
clay and a 10 inch square piece of clear acrylic for rolling logs of clay so that they are
even along the whole length.
The photo below shows another area that I often use since it has a harder and
smoother surface, but the board is dark and I find it less easy to see the cut edges of
some colors of clay. This is the darker board that usually has its place near the
machine roller for the flat pieces of clay as you see in the photo below.
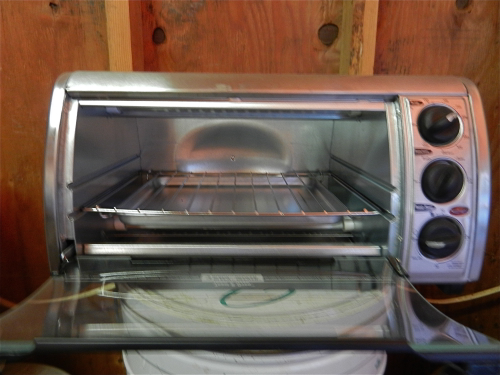
When I have some pieces cut, shaped and pierced, they are ready for baking. So I lay
my reliable mercury thermometer near the front of the glass window of the oven,
preheat the oven for half an hour, and then put the pieces into the oven for an hour,
timed with my reliable digital timer with an insistent alarm on it. Here is the small oven
that I use in the crafts room.
After I remove my Polly Ceramica creations from the oven and allow them to cool, I sort
out the beads and small pendants that need some smoothing and put them with smooth
riverbank pebbles into the electric rock tumbler and allow them to roll around with the
pebbles for a few to several hours.
They will still need sanding, buffing and waxing and buffing again, which I do with my
most valuable and adaptable tools -- my hands.
Thank you for reading my post. You are welcome to visit my studio at
http://CraftsofthePast.artfire.com.
There you may find listings of Polly’s ceramics, but I don’t
list many of my art clay creations for sale yet. I am busy working on some unusual
designs for a special kind of ornamentation: the inro or reliquary that can be worn as a
pendant necklace or as an accessory on a belt. I also will be making, or at least
attempting to make, some polymer encrusted linen diary or journal covers in the
upcoming weeks. Whether or not I have anything listed for sale, I thought you might
like to take this blog journey with me, so I wrote this journal entry as a post on
ByYourHands.